Capturing the magic of sunrise and sunset in your travel photography requires more than just pointing your camera at the sky. This guide delves into the art of golden hour photography, providing practical tips and techniques to elevate your images from snapshots to breathtaking masterpieces. From mastering camera settings and composition to understanding light and color, we’ll equip you with the knowledge and strategies to consistently capture stunning images during these fleeting moments.
We’ll explore location scouting, essential gear, post-processing techniques, and even travel hacks to maximize your efficiency and minimize stress. Whether you’re a seasoned photographer or just starting out, this comprehensive guide will help you unlock the full potential of sunrise and sunset photography, transforming your travel experiences into unforgettable visual narratives.
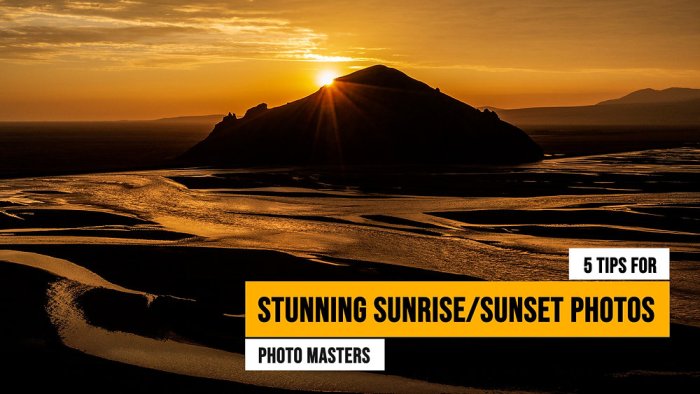
Golden Hour Photography

The golden hour, that magical time shortly after sunrise and before sunset, offers photographers a unique opportunity to capture stunning images. The soft, warm light casts long shadows and creates a rich, vibrant atmosphere unlike any other time of day. Mastering the techniques of golden hour photography can elevate your images from good to breathtaking.
Camera Settings for Golden Hour
Optimal camera settings for golden hour photography depend on the specific scene and desired effect, but some general guidelines apply. Begin by shooting in Aperture Priority (Av or A) mode, allowing you to control the depth of field. A wider aperture (lower f-number, such as f/2.8 or f/4) will blur the background, emphasizing your subject. A narrower aperture (higher f-number, such as f/8 or f/11) will keep both foreground and background in sharp focus.
Your ISO should be kept as low as possible (ideally ISO 100) to minimize noise, particularly given the lower light levels. Adjust your shutter speed accordingly to achieve a properly exposed image. Consider using a tripod for sharper images, especially at lower light levels. Experiment with white balance settings; the “Cloudy” setting often produces warmer tones during golden hour.
Composition Techniques: Rule of Thirds and Leading Lines
Effective composition is crucial for compelling golden hour images. The rule of thirds, a fundamental photographic principle, suggests placing key elements along imaginary lines that divide the frame into thirds both horizontally and vertically. For instance, a lone tree silhouetted against a vibrant sunset could be positioned at one of these intersection points, creating a more visually appealing image than centering it.
Leading lines, such as roads, rivers, or fences, can draw the viewer’s eye into the scene, leading them towards the main subject. A winding path leading towards a sun-drenched mountain range during sunset is a classic example of effective leading lines.
Utilizing Backlighting for Silhouettes and Dramatic Effects
Backlighting, where the light source is behind your subject, is a powerful technique for creating dramatic silhouettes and moody atmospheres. By positioning your subject between you and the setting sun, you can create a striking silhouette, emphasizing the subject’s shape and form against the bright background. Metering for the background rather than the subject is key to achieving this effect.
Careful consideration of exposure is needed to balance the bright background with the darker silhouette. Experiment with different exposure compensations to fine-tune the result. The result is a visually powerful image that captures the essence of the golden hour.
RAW vs. JPEG Image Formats
Choosing between RAW and JPEG file formats significantly impacts your workflow and final image quality. Here’s a comparison:
| File Size | Image Quality | Editing Flexibility | Storage Needs |
|---|---|---|---|
| Larger | Higher, more detail and dynamic range | Greater; allows for extensive adjustments in post-processing | More storage space required |
| Smaller | Lower; less detail and dynamic range | Limited; fewer options for adjustments | Less storage space required |
Location Scouting and Planning for Sunrise/Sunset Shots
Successful sunrise and sunset photography hinges on meticulous planning. A well-researched location and a thoughtfully constructed itinerary are crucial for maximizing your chances of capturing stunning images. Failing to plan adequately can lead to missed opportunities and frustrating experiences. This section will guide you through the process of location scouting and itinerary creation for optimal golden hour photography.
Thorough pre-planning significantly increases your chances of capturing breathtaking sunrise and sunset photos. This involves considering various factors that can directly impact the quality of your images and your overall experience. Neglecting these aspects can lead to disappointment, wasted time, and subpar results.
Researching Locations and Considering Environmental Factors
Before embarking on your photography adventure, dedicate time to researching potential locations. Utilize online resources like Google Maps, photography communities, and travel blogs to identify spots known for their picturesque sunrises and sunsets. Consider factors like weather patterns—check historical weather data for the time of year you’ll be shooting—to anticipate potential challenges like cloud cover or rain. Also, assess accessibility.
Is the location easily reachable? Will you need special permits or equipment to access it? Understanding these aspects beforehand will save you time and potential frustration on the day of your shoot. For instance, if you’re planning to shoot at a beach, checking the tide times is crucial to ensure the composition you envisioned isn’t submerged!
Finding Unique and Less-Crowded Locations
Popular sunrise and sunset spots often attract large crowds, hindering your ability to capture unique perspectives. To avoid this, explore lesser-known locations. Utilize tools like Google Earth to scout areas that might offer stunning views but remain relatively undiscovered by photographers. Consider visiting locations during off-season or on weekdays to minimize the number of people present. Think beyond the obvious viewpoints; sometimes the most compelling images are found in unexpected places, such as a quiet street reflecting the golden light or a secluded park with a beautiful tree silhouette.
Remember to always respect private property and any local regulations.
Sample Itinerary for a Day of Golden Hour Photography
A well-structured itinerary ensures you maximize the limited time available during the golden hours. Here’s a sample itinerary for a day focused on capturing sunrise and sunset:
The following itinerary provides a flexible framework. Adjust timings based on the specific location’s sunrise and sunset times, travel duration, and personal preferences.
- 4:00 AM: Wake up, prepare gear, and have breakfast.
- 4:30 AM: Depart for the sunrise location, allowing ample time for travel and setting up.
- 5:00 AM – 7:00 AM: Capture sunrise photographs, experimenting with different compositions and angles.
- 7:00 AM – 12:00 PM: Explore the area, potentially finding other photo opportunities or taking a break.
- 12:00 PM – 1:00 PM: Lunch.
- 1:00 PM – 4:00 PM: Explore other locations or rest.
- 4:30 PM: Arrive at the sunset location, set up equipment.
- 5:00 PM – 7:00 PM: Capture sunset photographs.
- 7:00 PM: Return home, review and back up images.
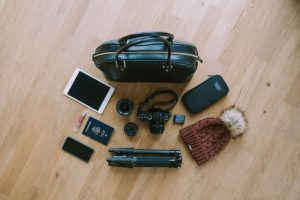
Essential Gear for Sunrise/Sunset Photography
Having the right equipment is crucial for capturing high-quality images. Remember that comfort is also key, as you may be spending several hours outdoors.
The following list comprises essential items for a successful sunrise/sunset photography session. Ensure you have everything checked and ready before you leave.
- Camera body (full-frame or APS-C sensor recommended)
- Wide-angle and telephoto lenses (to cater to various compositions)
- Tripod (essential for sharp images in low light)
- Remote shutter release (to minimize camera shake)
- Extra batteries (low light conditions drain batteries faster)
- Memory cards (sufficient storage for many images)
- Lens cleaning kit
- Headlamp or flashlight
- Warm clothing (evenings and mornings can be chilly)
- Comfortable walking shoes
- Insect repellent
- Sunscreen
- Water bottle
Mastering Light and Color in Sunrise/Sunset Photography
Sunrise and sunset photography offers a unique opportunity to capture breathtaking colors and moods. The quality of light during these times is dramatically different from midday, influencing the overall atmosphere and emotional impact of your images. Understanding these differences and employing appropriate techniques is crucial for creating truly captivating photographs.
Sunrise and Sunset Light Qualities and Their Impact on Image Mood
The low angle of the sun during sunrise and sunset produces a softer, warmer light compared to the harsh, direct light of midday. This soft light creates long shadows, which add depth and dimension to your images. The color temperature shifts dramatically, ranging from warm oranges and reds at sunrise/sunset to cooler blues and purples in the surrounding sky.
These warm tones often evoke feelings of tranquility, romance, or nostalgia, while cooler tones can convey a sense of mystery or serenity. The intensity of color is also highly dependent on atmospheric conditions; clear skies will yield vibrant hues, while hazy or cloudy conditions will produce more muted, pastel tones. For example, a sunrise shot with fiery oranges and reds over a silhouetted mountain range will feel quite different than a sunset image with soft pastel pinks and blues over a calm ocean.
The former might suggest adventure and drama, while the latter suggests peace and reflection.
Using Filters to Enhance Colors and Manage Exposure
Filters are invaluable tools for controlling light and enhancing colors during golden hour. Neutral Density (ND) filters reduce the amount of light entering the lens, allowing you to use slower shutter speeds for smoother water or clouds or wider apertures for shallower depth of field even in bright light. Polarizing filters reduce glare and reflections, saturating colors and increasing contrast, particularly effective for landscapes and waterscapes.
Graduated Neutral Density (GND) filters are helpful in balancing exposure between a bright sky and a darker foreground, preventing overexposure in the sky while maintaining detail in the shadows. For instance, an ND filter might be used to create a dreamy, silky effect on a waterfall at sunset, while a polarizer could enhance the vibrancy of a sunset reflecting on a lake.
A GND filter would be useful to balance the bright sky during a sunset over a field, ensuring both are well exposed.
Post-Processing Techniques for Enhancing Colors and Contrast
Post-processing allows for subtle or dramatic adjustments to your sunrise/sunset images. Tools like curves and levels can be used to refine contrast and enhance color saturation. Selective adjustments using masking or brush tools allow for targeted color corrections and contrast boosts. The “Vibrance” and “Saturation” sliders can be carefully used to enhance the colors without making them appear unnatural.
However, it’s crucial to avoid over-processing, which can lead to an artificial look. A good approach is to make subtle adjustments that enhance the natural beauty of the scene. For example, slightly increasing the saturation of the oranges and reds in a sunrise photo can make the colors “pop” without looking unrealistic. Similarly, carefully using curves to lift the shadows and darken the highlights can improve the overall dynamic range of the image.
Step-by-Step Guide to Using White Balance for Accurate Color Capture
Accurate white balance is critical for capturing the true colors of sunrise and sunset. Different lighting conditions require different white balance settings.
- Assess the scene: Observe the overall color temperature of the light. Is it predominantly warm or cool?
- Choose a preset: Start with a preset white balance option on your camera. Options like “Cloudy,” “Shade,” or “Tungsten” may be suitable depending on the scene’s overall color cast. Experiment to see what works best.
- Shoot in RAW: Shooting in RAW format provides significantly more flexibility for white balance adjustments in post-processing. This allows you to fine-tune the white balance later without losing image quality.
- Use a custom white balance: For precise control, use your camera’s custom white balance function. This involves taking a photograph of a neutral gray card under the same lighting conditions as your sunrise/sunset shot. The camera will then use this reference to set the white balance accurately.
- Fine-tune in post-processing: Even with careful in-camera adjustments, minor tweaks might be needed in post-processing software. Use the white balance tool to make subtle adjustments until the colors appear natural and accurate.
Travel Hacks for Sunrise/Sunset Photography
Capturing stunning sunrise and sunset shots while traveling requires careful planning and efficient execution. Maximizing your time during the fleeting golden hour demands strategic preparation and a few clever tricks to overcome common travel challenges. This section will provide practical travel hacks to streamline your workflow and ensure you capture those breathtaking images.Efficient time management and smart packing are key to success in travel photography, particularly when working with the limited timeframe of the golden hour.
Unexpected weather can also significantly impact your shoot, so preparation for various conditions is crucial.
Travel Hacks for Maximizing Time and Efficiency
Effective time management during golden hour is crucial. Even a few wasted minutes can mean the difference between a perfect shot and a missed opportunity. These tips will help you make the most of your time.
- Pre-visualize your shots: Before your trip, research potential locations and plan your compositions. This saves valuable time on-site, allowing you to focus on capturing the image rather than searching for the perfect angle.
- Scout locations beforehand: If possible, visit your chosen location during the day to familiarize yourself with the terrain, light conditions, and potential obstacles. This pre-scouting minimizes surprises and allows for more efficient shooting during the golden hour.
- Utilize a timer or intervalometer: This allows for hands-free shooting, especially useful for long exposures or capturing a time-lapse sequence of the changing light. You can focus on adjusting settings or composing your next shot while the camera captures the current scene.
- Pack strategically: Organize your gear so that frequently used items are easily accessible. This minimizes time spent fumbling with your bag during the fleeting golden hour.
- Use a headlamp or flashlight: Sunrise and sunset shoots often occur in low-light conditions. A headlamp allows you to navigate safely and quickly adjust your equipment in the dark.
Efficient Packing for Photography Gear
Packing light while carrying essential photography gear requires careful consideration. The weight of your equipment can significantly impact your travel experience, especially if you’re hiking to remote locations. These strategies help you pack efficiently.
- Choose lightweight gear: Opt for carbon fiber tripods and lightweight lenses whenever possible. Modern mirrorless cameras are generally lighter than DSLRs, offering a good balance of performance and portability.
- Use packing cubes: These compress clothing and other items, freeing up more space for your photography gear. They also keep your gear organized and protected.
- Utilize a camera backpack with dedicated compartments: This keeps your gear organized, padded, and readily accessible. Consider a backpack that also has space for a laptop and other essentials.
- Leave behind unnecessary items: Be ruthless in evaluating what you truly need. Bringing less equipment minimizes weight and reduces the chance of losing or damaging something.
- Consider a smaller camera bag as a secondary option: For shorter trips or day shoots, a smaller bag can be more convenient than a large backpack. This allows you to carry only the essential gear needed for a specific shoot.
Strategies for Dealing with Unexpected Weather
Weather can be unpredictable, especially during sunrise and sunset. Being prepared for various conditions is vital to ensure a successful shoot.
- Check the forecast meticulously: Consult multiple weather sources before your shoot, paying close attention to cloud cover, wind speed, and precipitation. Be prepared to adjust your plans based on the forecast.
- Pack rain protection: Use a rain cover for your camera bag and consider a waterproof camera housing or protective sleeve for your camera and lenses.
- Have backup plans: If the weather turns unfavorable, have alternative locations or shooting strategies in mind. This might involve shifting your shoot to a different time or finding an indoor location with interesting light.
- Utilize weather apps with real-time updates: Monitor the weather throughout the day and be ready to adapt your plans as conditions change. This allows for a more flexible approach to shooting.
- Embrace unexpected conditions: Sometimes, unexpected weather can create unique and dramatic photographic opportunities. Be open to exploring how weather affects the light and landscape and use it to your advantage.
Travel Photography Beyond Sunrise/Sunset
While the golden hour’s soft light is undeniably captivating, a skilled travel photographer knows that compelling images can be captured throughout the day. Understanding how light behaves at different times and adapting your approach accordingly unlocks a wider range of photographic opportunities. This section explores various photographic approaches for capturing compelling images outside of the sunrise and sunset periods.The challenges and opportunities of shooting in various lighting conditions are significantly different.
Harsh midday sun presents unique difficulties, while overcast days offer a different set of advantages. Mastering these diverse conditions is key to becoming a versatile travel photographer.
Midday Sun Photography Techniques
Midday sun, often characterized by harsh shadows and high contrast, can seem daunting. However, by employing specific techniques, you can create impactful images. These techniques involve understanding and mitigating the strong light. Utilizing fill flash to soften shadows, seeking shade for diffused lighting, and focusing on strong graphic elements to emphasize form and texture are effective strategies. For example, shooting architectural details in strong sunlight can create dramatic highlights and shadows, enhancing the building’s texture and three-dimensionality.
Alternatively, seeking out shaded areas under trees or buildings provides softer, more even lighting, perfect for portraits or landscape shots that don’t rely on dramatic contrast. The key is to observe how the light interacts with your subject and utilize it to your advantage.
Overcast Day Photography
Overcast days, while lacking the dramatic light of sunrise or sunset, provide a consistently soft and diffused light. This even lighting minimizes harsh shadows, making it ideal for shooting landscapes, portraits, and even street photography. The lack of strong directional light necessitates a different approach. You’ll need to pay closer attention to composition and details to create visual interest.
Look for interesting textures, leading lines, and subtle variations in tone and color to add depth to your images. For example, a cityscape on an overcast day might lack the dramatic chiaroscuro of a sunny day, but the even light allows for a more detailed and nuanced capture of architectural details and atmospheric perspective. The soft light also tends to be flattering for portraits, reducing harsh shadows on faces and highlighting subtle skin tones.
Night Photography Techniques
Night photography offers a unique set of challenges and rewards. Long exposures are often necessary to capture sufficient light, leading to the need for a sturdy tripod and potentially noise reduction techniques in post-processing. However, the resulting images can be incredibly atmospheric and evocative. Light sources like streetlights, neon signs, and moonlight become key elements in your composition, creating a sense of mood and atmosphere.
Careful consideration of ISO, aperture, and shutter speed is crucial for achieving sharp, well-exposed images. For example, a long exposure of a city skyline at night can capture the trails of car headlights, creating dynamic streaks of light against the dark backdrop of buildings. Conversely, a shorter exposure might freeze the movement of traffic, highlighting individual vehicles and emphasizing the urban energy.
Experimentation is key to mastering night photography.
Travel Insurance and Visa Considerations
Planning a photography trip requires careful consideration beyond just the perfect shot. Protecting your investment, both financially and legally, is crucial for a smooth and successful journey. This section will address the importance of comprehensive travel insurance and the visa requirements for popular photography destinations.Travel insurance is paramount for photographers, offering protection against unforeseen circumstances that could derail your trip or cause significant financial losses.
Standard travel insurance often covers trip cancellations, medical emergencies, and lost luggage, but specialized policies are available to specifically address the needs of photographers.
Travel Insurance for Photographers
A comprehensive travel insurance policy tailored for photographers should include coverage for damaged or lost photographic equipment. This is particularly important given the high cost of professional cameras, lenses, and other accessories. The policy should clearly define the coverage amount for equipment loss or damage, specifying whether it covers accidental damage, theft, or loss due to airline mishandling. It’s advisable to check for specific clauses regarding the replacement value of your equipment versus repair costs, and ensure the policy covers the full replacement cost of your gear, not just its depreciated value.
Additionally, consider the inclusion of coverage for lost or damaged memory cards, as these can contain irreplaceable images. Always keep a detailed inventory of your equipment with serial numbers and purchase receipts as proof of ownership and value. This will facilitate a smoother claims process should you need to file one.
Visa Requirements for Popular Photography Destinations
Visa requirements vary significantly depending on your nationality and your destination. Popular photography destinations such as Iceland, New Zealand, and various national parks in the United States often require a visa or an ESTA (Electronic System for Travel Authorization) depending on your citizenship. For example, citizens of many European countries can enter the United States under the Visa Waiver Program (VWP), while others need to apply for a B-2 tourist visa.
Similarly, entry requirements for countries like Iceland or New Zealand may differ based on your nationality and the length of your stay. It’s crucial to check the specific visa requirements well in advance of your trip, as the application process can take several weeks or even months. Failure to obtain the necessary visa can result in being denied entry, leading to significant financial losses and the disruption of your travel plans.
Official government websites for the respective countries are the best sources for accurate and up-to-date visa information. Always apply for your visa well in advance of your intended travel dates to allow ample processing time.
Urban Escapes and Vacation Packages for Photographers
Urban environments offer a unique and dynamic backdrop for photographers, brimming with architectural marvels, vibrant street life, and captivating human stories. These settings provide endless opportunities for creative expression, whether you focus on capturing the grandeur of skyscrapers or the subtle details of everyday life. Combining urban exploration with thoughtfully planned photography vacations can elevate your photographic journey significantly.Many cities worldwide are renowned for their photographic appeal, offering diverse subjects and unique perspectives.
Vacation packages tailored to photography enthusiasts are also increasingly available, providing a structured and enriching experience.
Ideal Urban Destinations for Photography
Several cities stand out as prime locations for both street and architectural photography. New York City, with its iconic skyscrapers and bustling streets, offers a classic urban photography experience. The city’s diverse neighborhoods, from the vibrant energy of Times Square to the quieter charm of Greenwich Village, provide a wide range of photographic opportunities. Similarly, Chicago’s impressive skyline, featuring architectural masterpieces like the Willis Tower and the Cloud Gate (“The Bean”), presents stunning architectural subjects.
The city’s extensive lakefront also offers picturesque landscapes. For a different perspective, consider exploring the historic streets and canals of Venice, Italy, where architectural wonders meet daily life in a uniquely picturesque setting. The intricate details of the buildings and the movement of gondolas along the waterways provide a feast for the eyes and camera lens. Finally, Tokyo, Japan, offers a blend of modern architecture and traditional elements, resulting in a visually rich and dynamic urban landscape.
The juxtaposition of neon lights with ancient temples creates unique photographic opportunities.
Photography-Focused Vacation Packages
Photography-centric vacation packages are becoming increasingly common, catering to the specific needs and interests of photographers. These packages often include guided tours led by experienced photographers, providing insights into the best locations, lighting conditions, and compositional techniques. Workshops and tutorials might also be included, focusing on specific photographic styles or techniques relevant to the destination. For example, a package focused on architectural photography in Barcelona might include visits to Gaudi’s masterpieces, alongside instruction on capturing the intricate details and unique perspective of his designs.
Another example could be a street photography tour in Havana, Cuba, where a local photographer guides participants through the vibrant streets, providing tips on interacting with subjects and capturing authentic moments. These packages often incorporate comfortable accommodations and convenient logistics, allowing photographers to focus on their craft without the stress of planning every detail. The cost of such packages varies depending on the duration, destination, and level of expertise offered.
However, the structured approach and access to expert guidance often justify the investment for serious photography enthusiasts.
Additional Travel Tips
Planning a photography trip requires meticulous attention to detail, extending beyond just the photographic aspects. A smooth and enjoyable journey significantly impacts your ability to capture those perfect sunrise and sunset shots. Careful preparation and proactive measures can prevent unforeseen issues and allow you to focus on your creative endeavors. The following tips will help ensure a stress-free travel experience.Preparing for a successful photography trip involves more than just packing your camera gear.
Consider these additional factors to maximize your enjoyment and the quality of your images. Thorough planning can transform a potentially stressful journey into a rewarding and memorable experience.
Packing Essentials
Packing efficiently is crucial for travel, especially when carrying photography equipment. Overpacking can lead to discomfort and potential baggage fees. A well-organized bag containing only necessary items will ensure a smoother journey.
- Pack lightweight clothing items that can be layered for varying temperatures.
- Include comfortable walking shoes suitable for extended periods of exploration.
- Bring a universal adapter if traveling internationally to ensure your electronics can be charged.
- Carry a small first-aid kit with essential medications and bandages.
- Don’t forget a reusable water bottle to stay hydrated throughout the day.
Staying Healthy and Safe
Maintaining good health and safety is paramount when traveling. Taking preventative measures can minimize the risk of illness or injury, allowing you to fully enjoy your trip.
- Consult your doctor about necessary vaccinations and medications for your destination.
- Stay aware of your surroundings and take precautions against petty theft.
- Make copies of your passport, visa, and other important documents and store them separately from the originals.
- Inform someone at home of your itinerary and expected return date.
- Learn a few basic phrases in the local language to facilitate communication.
Budgeting and Finances
Careful financial planning is essential for a stress-free trip. Understanding your expenses and having a contingency plan can prevent financial difficulties during your travels.
- Create a detailed budget that includes flights, accommodation, food, activities, and miscellaneous expenses.
- Inform your bank and credit card companies of your travel dates to avoid any issues with card usage.
- Carry a mix of cash and credit cards for various payment options.
- Consider travel insurance to protect against unforeseen circumstances such as medical emergencies or trip cancellations.
- Track your expenses throughout the trip to stay within your budget.
Illustrative Example
Imagine waking before dawn, the air still cool and crisp, to witness a sunrise over a majestic mountain range. This isn’t just any sunrise; it’s a spectacle of light, color, and breathtaking composition, a perfect example of the magic that awaits photographers willing to rise early. The scene unfolds slowly, painting the sky with vibrant hues.The initial light, a soft, pale lavender, gradually intensifies.
This pre-dawn light, known as the blue hour, offers unique opportunities for capturing deep blues and purples, enhancing the dramatic silhouette of the mountain peaks against the darkening sky. As the sun begins its ascent, the eastern horizon explodes with color. Fiery oranges and deep reds blend seamlessly with the lingering blues, creating a breathtaking palette. These intense colors are reflected in the dew-kissed meadows at the base of the mountains, adding another layer of visual interest.
Light and Color Dynamics
The light itself is dynamic, constantly shifting and changing as the sun rises higher. Initially, the light is soft and diffused, casting long, dramatic shadows that stretch across the landscape, accentuating the rugged texture of the mountains. As the sun climbs, the light becomes more direct, illuminating the peaks with a golden glow, revealing details in the rock formations and highlighting the textures of the snow-capped summits.
The clouds play a crucial role in this interplay of light and shadow. If present, they may catch the sunrise’s glow, transforming into fiery, incandescent masses, adding depth and drama to the composition. Conversely, clouds can diffuse the light, creating a softer, more ethereal mood. The overall effect is a symphony of color and light, constantly evolving and offering unique photographic opportunities.
Composition and Framing
The composition is key to capturing the essence of this scene. The photographer could choose to position the mountain range in the center of the frame, creating a symmetrical and balanced image. Alternatively, a rule of thirds composition, placing the mountains off-center, can add visual interest and dynamism. The foreground is equally important. A foreground element, such as a field of wildflowers or a meandering stream, can add depth and context to the image, guiding the viewer’s eye towards the majestic mountain peaks.
The shadows cast by the mountains themselves can also be utilized to create leading lines that draw the eye into the scene. Careful consideration of the composition ensures that the resulting image is both aesthetically pleasing and effectively conveys the grandeur of the sunrise over the mountain range.
Overall Mood and Atmosphere
The overall mood is one of awe and tranquility. The stillness of the pre-dawn air, the vibrant colors of the sky, and the imposing presence of the mountains combine to create a scene of profound beauty. The photographer can capture this mood by choosing a slower shutter speed to capture the movement of the clouds or by using a wide aperture to create a shallow depth of field that isolates the mountains from the foreground.
The image should evoke a sense of peace and wonder, capturing the ephemeral beauty of the sunrise and the timeless majesty of the mountains.
Illustrative Example
Imagine capturing the vibrant hues of a sunset painting the sky above a bustling cityscape. This scenario offers a wealth of photographic opportunities, demanding careful consideration of light, color, and composition to truly capture the magic of the moment. The interplay between the warm glow of the setting sun and the cool tones of the city at night creates a dramatic and visually arresting scene.The scene unfolds with a breathtaking panorama of skyscrapers silhouetted against a fiery sky.
The buildings, rendered in dark, sharp Artikels against the bright backdrop, become architectural sculptures, their forms accentuated by the contrast. The light itself is the star of the show; a gradient of intense oranges, fiery reds, and soft pinks dominates the upper half of the frame, gradually fading into deeper blues and purples as the sun dips below the horizon.
This transition from warm to cool tones creates a captivating visual narrative.
Sunset Colors and Light
The light during this sunset is incredibly dynamic. The direct sunlight casts long shadows, emphasizing the three-dimensionality of the buildings. However, the diffused light from the sky creates a soft, almost ethereal glow on the surfaces facing the setting sun, subtly highlighting textures and architectural details. The reflected light from the sky onto the glass facades of the skyscrapers adds another layer of complexity, creating shimmering highlights and vibrant reflections of the sunset’s colors.
The overall effect is a breathtaking blend of warmth and coolness, light and shadow, creating a rich tapestry of color and texture.
Cityscape Silhouettes and Reflections
The silhouettes of the buildings form a strong compositional element, creating a sense of depth and scale. Their stark Artikels against the vibrant sky create a dramatic contrast, drawing the viewer’s eye across the scene. The reflections of the cityscape in the glass and water features (if present, such as a river or lake) mirror the sunset’s colors, adding another layer of visual interest and creating a sense of symmetry and harmony.
These reflections, often softer and less defined than the buildings themselves, add a dreamlike quality to the image, enriching the overall atmosphere.
Overall Atmosphere and Composition
The overall atmosphere is one of serene beauty and dramatic energy. The combination of the vibrant sunset colors, the sharp silhouettes of the buildings, and the soft reflections creates a powerful and memorable image. The composition, ideally, would leverage leading lines (such as streets or rivers) to guide the viewer’s eye through the scene. The placement of the horizon line, roughly one-third of the way up from the bottom of the frame, would create a balanced and aesthetically pleasing composition, following the rule of thirds.
The image would evoke a feeling of calm contemplation, yet also a sense of the vibrant energy of the city life below.
Mastering sunrise and sunset photography is a journey of learning and experimentation. By understanding the nuances of light, mastering composition techniques, and planning effectively, you can consistently capture stunning images that reflect the beauty and emotion of these special times of day. Remember, the most rewarding aspect is the process itself – the anticipation, the exploration, and the creative satisfaction of transforming fleeting moments into lasting memories.
So grab your camera, embrace the golden hour, and let your creativity soar!
General Inquiries
What’s the best time to arrive at a location for sunrise/sunset photography?
Arrive at least 30-45 minutes before sunrise or sunset to scout the location, set up your equipment, and compose your shots.
How do I deal with strong backlighting?
Use spot metering to expose for the subject, not the bright background. Consider using fill flash or reflectors to illuminate the subject.
What are some good apps for finding sunrise/sunset times?
Many weather apps and dedicated photography apps provide accurate sunrise/sunset times for your specific location. “The Photographer’s Ephemeris” is a popular choice.
How do I protect my camera gear from the elements during a shoot?
Use a rain cover or waterproof bag for your camera and lenses. Consider using a lens hood to protect from stray light and potential rain.